Showing posts with label screens. Show all posts

Saturday, 31 August 2013

The Big Desk Move - Pt6: Rack TFT

I'll admit, this is rather superfluous and had I not had the bits still lying around form last time, I wouldn't have put this back together as the 1U KVM drawer in the server rack below rather makes this redundant.

The comms rack has a nice big window in the door on the front and conveniently I have a spare TFT from when this was previously done. The last time was when the rack itself was on stilts over my three 24" screens  and desk. It ended up attached to my PC for misc windows which would otherwise be hidden (skype/gtalk/etc) and had a nice cascade effect for the matrix screen saver, but was otherwise pretty useless.


The screen is an old 15" Sony I got from a friend some years back and have found a few uses for over the years.


With the door off and the screen placed where I wanted it some metal brackets were roughly bent to fit the shape and then rolled at the ends to fit into the grooves on the door. The mounting screws for the VESA/similar mounts allowed the two pieces to be fixed and create an effective spring retention system.


The PSU is not in the screen itself (thanks Sony) so its wedged under the power bar int he bottom of the rack next to the old PIX501.


With the door back on the cables were attached so that they wont bind and can still be removed if the door has to come off.


All in all pretty simple and effective. The plan for this now is to run from my old laptop in the comms rack as a super low powered monitoring box for the network, and from that, ALL THE GRAPHS!


the one downside to this is extra heat, and the minor problem with that is the button for the screen is on the front of the TFT, so the only way to power it off is to use the kettle lead. This might not be as much of a problem if i move the screen to another project in the future and just view the graphs over the network, maybe on the TV...

Monday, 12 August 2013

The Big Desk Move - Pt3: Loading the Screen Arm

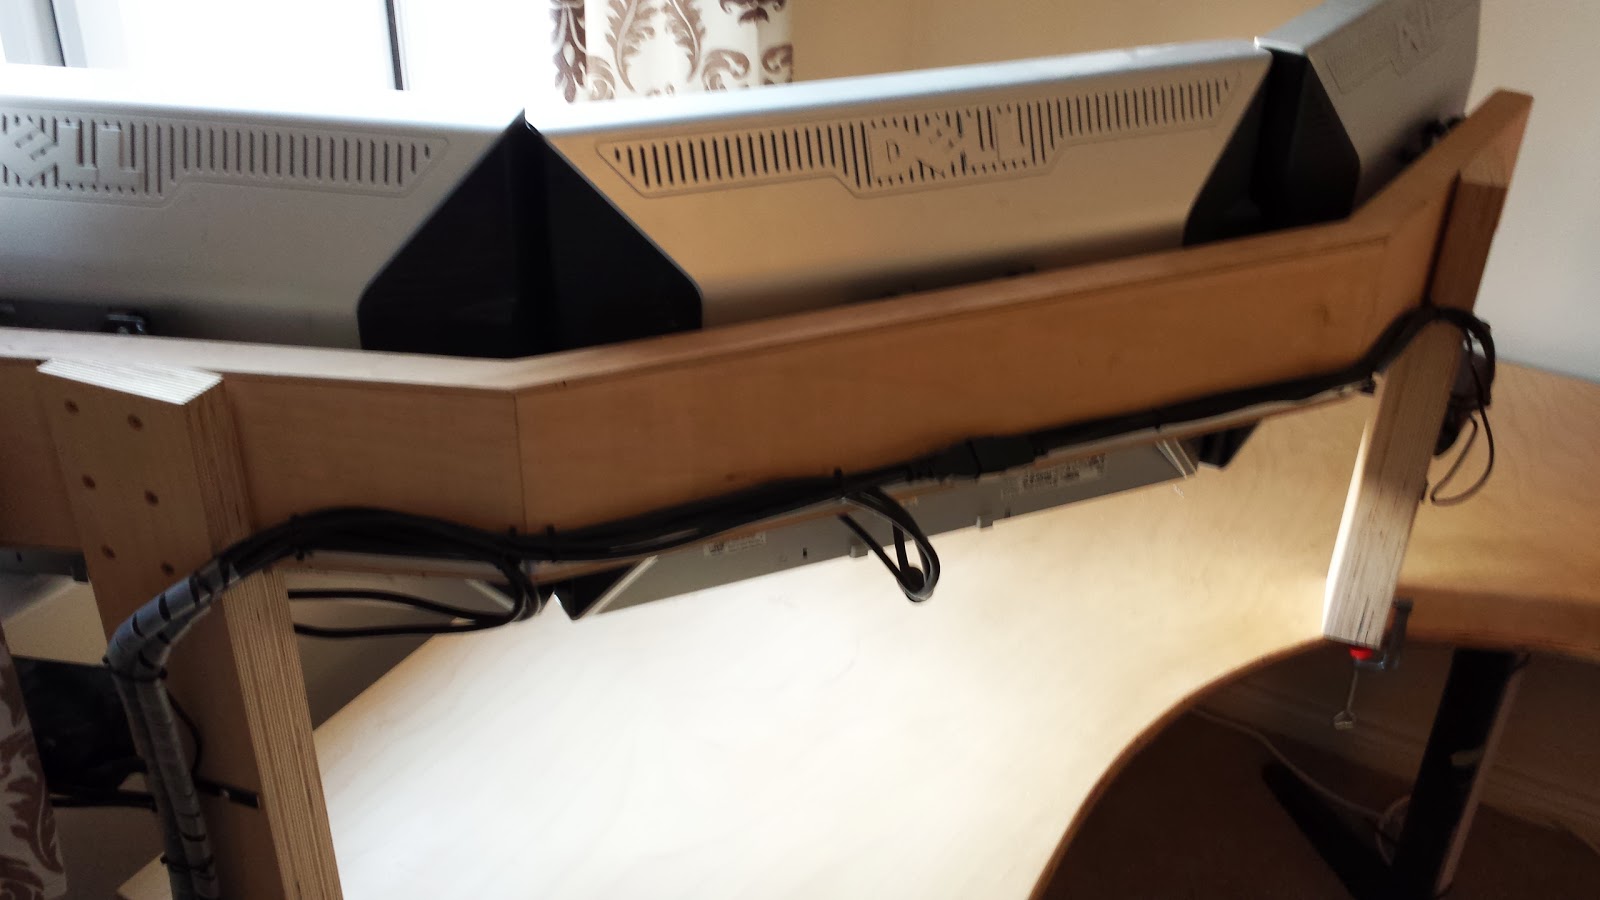
With the arm rebuilt and temporarily clamped to the desk front the cables were rewired as mentioned before. Compared to the previous post, this is SO much better.


The cables flow and emerge from the bundles much nicer and still allow easy removal when the screens come off.


With the arm moved with a little help the final result is a completely cable free view and the cleanest the desk will ever be.


Just as I promised, clutter.


But at least with the screens setup after nearly 2 days of work (although some of those days were spent out and about with parents) I have a PC once again. Although theres no internet to use it with yet, that comes next.

Monday, 5 August 2013

The Big Desk Move - Pt 2: Screens

With the desk built, the arduous task of building all the remaining pieces back up remained. Firstly the screens.

A while back I got sick of the screens being on their stands taking up a load of space on the desk itself and started making a single arm to hold them, and my speakers up out of the way.


The construction is two pieces of 18mm plywood to form the beam, with 3mm plywood on top and bottom to hide the grain and to hopefully prevent anything getting into the laminate. The posts are three layers of 18mm Birch plywood to match the desk with a shoulder cut into it to hold the beam.


The posts are screwed into the beam and then two special clamps hold it to the desk at each post. the stand is neutrally weighted so it wont tip unless there are screens on, and even when they are on, they're pretty evenly weighted.

Across the back is a mess of wires help in place wherever they fell in bunches using sticky hooks. It worked ok, but far from perfect.


New plan! A piece of scrap angle iron drilled and bent to fit around the base would hold the cables out of the way of the desk and make them neater and easier to work on if needed.


I ended up putting the support on the other way up to lift the cables a bit higher and avoid fouling the windowsill.


This makes it much neater overall, and while I was at it, I swapped the cable for the left most screen from VGA+extension to a single HDMI cable with some adapters to DVI. Much better picture and it leaves the left screen VGA available for the rack should it need it.