Showing posts with label table. Show all posts

Thursday, 27 March 2014

The Great living room shuffle.

[From the archive of things-I-didn't-get-round-to-posting-at-the-time]

Since i moved in nearly 4 years ago I've been moving the lounge around bit by bit trying to find the best use of space and as yet I've not really found anything which is satisfying. Its get better each time, but never really been "perfect"
The latest arrangement I did about 5 months ago and it almost exactly the opposite of what it was when i move in (at least for the TV/Sofa anyway) and works pretty well. But still isn't what I envisage or exactly right, but i guess its the best i'll get.

The TV unit got moved from the right-hand wall to the back wall of the house, but the window faces directly into the sun, so wasn't ideal.


The sofa sectioned off the bar/bookcases from the main lounge and really didn't help when there were more than a few people round. (shown mid move, it was normally further away from the back bookcases)


The dining table was against the wall, which was fine until it was used. You ended up eating facing a wall, with the only light source in the room behind you, eating in the shadows. Plus the chairs and table got in the way of the cupboard door.


One day, move ALL the things! The TV unit came apart as it was too big to fit where the table was without obstructing the door a lot so it was reduced in size (too much as it turns out, but i'll post about that another time)


The TV ended up where the Table was, the table went by the bar and bookcases and made a kind of dining area, and the sofa went on the opposite wall to the TV. The downside of this is that the TV is a long way from the sofa, and despite being 40" looks, dare I say, small. Pulling the sofa into the middle of the room means there's a lot of dead space behind it.

UPDATE:
Alas, since writing this and before it was fully sorted, (although much tidier and better laid out than this) It's come up that I'll likely have to move this year, so all of this is for nothing. Back to square one for somewhere new!

Friday, 16 August 2013

The Big Desk Move - Pt4: How to Wall Mount a TV Without Using the Wall

One of the problems with moving everything into one room is displacing what was there before. Previously where the right end of the desk is was a chest of drawers with a TV on to watch in bed.

So now with the desk there the TV has to be re-mounted to continue this and watch things form the PC in bed too. The problem with living in a rental is while you can get away with a great deal if the landlords are nice, you can't always do major drilling into walls, nor is it wise to ask when they have already said yes to so much.

Enter a new idea, The Giant Bit Of Wood.


The wood fits down the back of the desk and is wedged between the leg underneath and the skirting board to stop it sliding out underneath, against the desk at the middle and then at the top to stop it going backwards to the wall.


Due to the sockets on the back clearance for plugs was questionable, so a space was fitted to the wood where needed.


Not taking any chances, the spacer is screwed to the wood perhaps a few too many times.


The bracket is then bolted through and the studs cut to length with a dremel.


Back in place the hole for the cables to enter without being seen is visible as well as the bracket.


Underneath the desk the upright is attached with a couple of small angle brackets to stop it falling away and leaving a gap. This together with the base being wedged holds it pretty well with little sway.


Just to be sure, a single block is screwed into the wall to push the top away and hold everything rigid. One hole shouldn't be a problem. So long as it's filled before I leave, they have no issue with temporary fixings.


Next job, mount the TV, over a desk allowing for almost no visibility of where the brackets line up or where the screw holes go. Simples!


I'll leave the finished shots to the end once everything is setup and crucially, neat.

Monday, 12 August 2013

The Big Desk Move - Pt3: Loading the Screen Arm

With the arm rebuilt and temporarily clamped to the desk front the cables were rewired as mentioned before. Compared to the previous post, this is SO much better.


The cables flow and emerge from the bundles much nicer and still allow easy removal when the screens come off.


With the arm moved with a little help the final result is a completely cable free view and the cleanest the desk will ever be.


Just as I promised, clutter.


But at least with the screens setup after nearly 2 days of work (although some of those days were spent out and about with parents) I have a PC once again. Although theres no internet to use it with yet, that comes next.

Monday, 5 August 2013

The Big Desk Move - Pt 2: Screens

With the desk built, the arduous task of building all the remaining pieces back up remained. Firstly the screens.

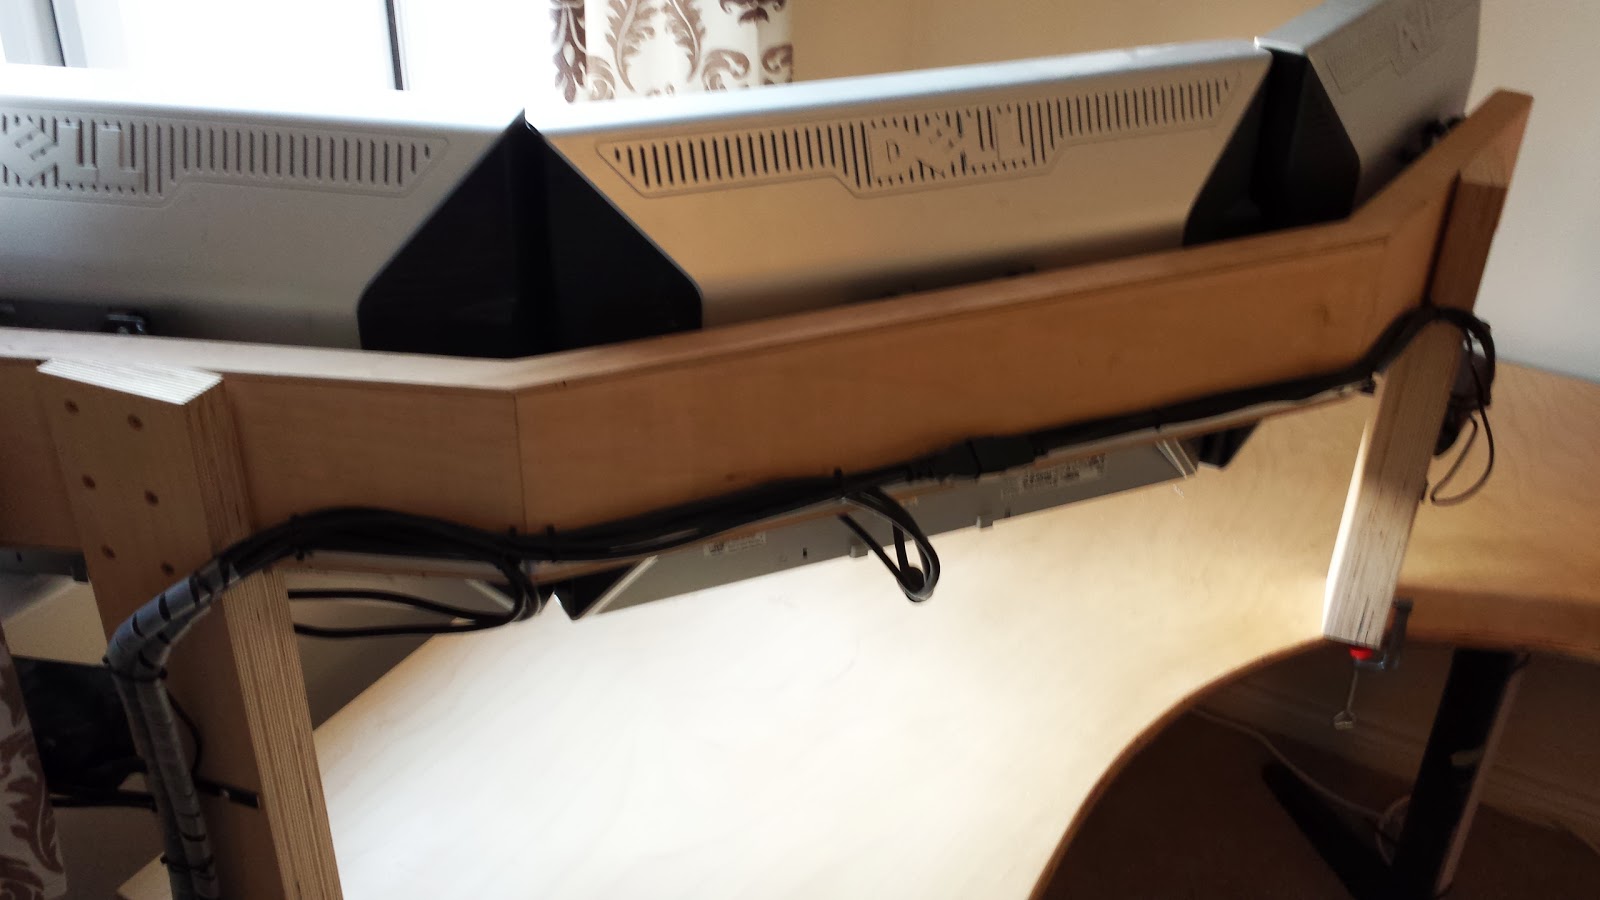
A while back I got sick of the screens being on their stands taking up a load of space on the desk itself and started making a single arm to hold them, and my speakers up out of the way.


The construction is two pieces of 18mm plywood to form the beam, with 3mm plywood on top and bottom to hide the grain and to hopefully prevent anything getting into the laminate. The posts are three layers of 18mm Birch plywood to match the desk with a shoulder cut into it to hold the beam.


The posts are screwed into the beam and then two special clamps hold it to the desk at each post. the stand is neutrally weighted so it wont tip unless there are screens on, and even when they are on, they're pretty evenly weighted.

Across the back is a mess of wires help in place wherever they fell in bunches using sticky hooks. It worked ok, but far from perfect.


New plan! A piece of scrap angle iron drilled and bent to fit around the base would hold the cables out of the way of the desk and make them neater and easier to work on if needed.


I ended up putting the support on the other way up to lift the cables a bit higher and avoid fouling the windowsill.


This makes it much neater overall, and while I was at it, I swapped the cable for the left most screen from VGA+extension to a single HDMI cable with some adapters to DVI. Much better picture and it leaves the left screen VGA available for the rack should it need it.

Monday, 29 July 2013

The Big Desk Move - Pt1: Pack Down and Move Out!

As Jonnie is moving in with me, I have to move all my computer stuff from the second bedroom in order for him to have space for a few bits and pieces, like a bed. And maybe some clothes? (please god let there be clothes).

So the way my desk is currently:

I'm by the window and the server rack (yes, I have a server rack, and a comms rack, but more on those later). Its usually pretty cluttered but when its not, it looks...


...like this! I'll come onto the TFT Rail later as its due an update.


To the right is a big extension for my girlfriends PC and enough space to work easily between or have up to a 4 person LAN.


Without the desk, the rooms seems pretty huge.


In the new room (yes, it looks incredibly similar, every room is Crown Magenta walls and beige carpet) the desk fits pretty well, but the space is narrower so the left edge of the desk has to be shortened to fit the rack (which is also moving with the PCs)


One makeshift work bench later and its cut to size.


The legs are a mix of heavy duty desk legs I got from another friend sometime ago and Ikea's finest grey table leg. Unfortunately for a comfortable height for the desk, the Ikea legs need to be raised a little with some blocks.


Cue the better part of an hour trying to get all the adjustable legs o match those of the Ikea ones.


The extension was also cut down but still leaves a sizable gap to work between our machines when needed.

There's a lot more work to this yet so i'll do another update in due course.

Friday, 18 May 2012

Trek Table

In a posting frenzy, today i present to you, the Trek Table.

After a night out in Reading a friend (Kat @geekonaleash) noticed a table in the bar we were in in the shape of a shirt badge and immediately began pining for it.

With a birthday coming soon i said i'd make one for her (foolishly) not having a full plan of how to do it.

First job, design and template. The design is fairly easy to copy and scale up with some subtle teaks to make it a bit more useful as a table.


Next a hardboard template for the router to follow.


Next (and i forgot to take a picture of the first part of this) cut a rough shape from two pieces of 18mm MDF which were glued together to make a substantial chunky top and clamp. You can never have enough clamps.


Once its dry, add the template and route it.


Success! One neatly trimmed table top! The next step was to route the edge over to make it slightly less sharp with a 45 degree chamfer.


Add legs and varnish, and done!


 Fairly successful and reasonably sized table. I would have liked to have angled legs, but this would have posed two problems. One, the legs would be a pain to mount in a secure way and two, if someone were to inadvertently sit on it, the legs would splay out and rip them off. So no.